Dorm Room Storage Ideas: How to Find Space You Did Not Know You Had
These dorm room storage ideas will help you uncover
practical capacity beneath the bed, inside the wardrobe, above
shelves and within overlooked gaps—without filling the room with
containers that restrict movement or make everyday belongings harder
to reach.
You will learn how to measure the real room, claim unused capacity,
match each category to the right storage format and adapt the system
after move-in.
Measure the supplied furniture and confirm your accommodation rules
before purchasing risers, door organisers, adhesive products or
dimension-dependent containers.
A successful dorm-storage plan uses the supplied room first,
preserves access and keeps the central floor area open.
Before You Add Another Container
Why Dorm Room Storage Ideas Must Begin With the Room You Actually Have
Useful dorm room storage ideas are not measured by
how many boxes fit into a photograph. They are measured by whether the
student can reach everyday belongings, open the supplied furniture,
move through the room safely and transport the system again at the end
of the academic year.
1
Every Dorm Begins With Fixed Limits
The bed, wardrobe, desk, door position and safety equipment are
usually supplied before the student arrives. A storage plan must
work around those fixed elements instead of pretending the room is
an empty apartment.
2
Supplied Capacity Comes First
Drawers, high shelves, wardrobe floors and under-bed clearances may
already provide more useful space than expected. Recording what
exists prevents duplicate products from consuming the remaining
floor area.
3
Access Matters More Than Maximum Volume
A deep container is not helpful when three other objects must be
moved before it can open. Frequently used belongings deserve the
easiest positions, while occasional items can occupy deeper or
higher zones.
4
Residence Rules Change the Plan
Bed risers, over-door organisers, adhesives and furniture
adjustments may be allowed in one building and restricted in
another. Approval must come before any product that alters supplied
furniture or affects doors and walls.
5
Storage Should Follow Real Routines
Shoes, laundry, toiletries and study supplies travel along
different paths. Positioning each category close to where it enters,
leaves or gets used reduces the effort required to return it.
6
The System Must Be Able to Change
Move-in assumptions rarely survive an entire term. Strong storage
can be resized, relocated or repurposed when real habits reveal that
a different arrangement would work better.
The Houselyn Dorm Storage Map
Measure, Claim, Match, Access and Adapt
The chapters ahead organise dorm room storage ideas
into five connected stages so that every container, shelf and storage
zone answers a real need.
1
Measure
Record dimensions, clearances, supplied features and current
restrictions.
2
Claim
Identify overlooked capacity beneath, above, inside and between
existing furniture.
3
Match
Select a format suited to the contents, weight, visibility and
available space.
4
Access
Place frequently used categories where retrieval and return remain
simple.
5
Adapt
Revise the arrangement when student life reveals friction or
unused capacity.
How to Use This Storage Guide
Begin with Chapter 1 even when one storage problem already feels
urgent. A short measurement audit can prevent a solution for one area
from causing a new obstruction somewhere else.
Before Move-In
Record confirmed dimensions, list supplied features and separate
safe early purchases from products that must wait.
During Setup
Build the high-capacity zones first, then position everyday
categories according to access and movement.
After Two Weeks
Observe which areas create extra work and revise the system before
purchasing more containers.
Part I • Discover the Capacity
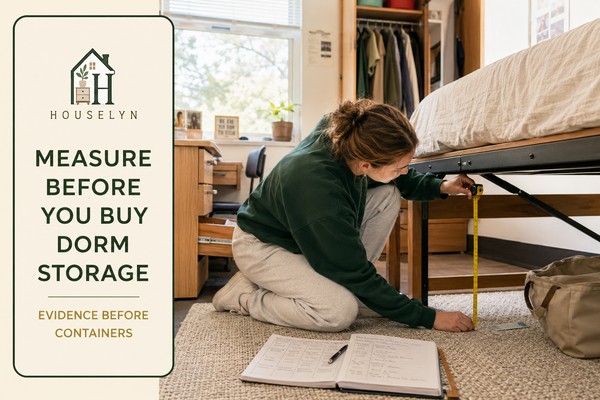
Measure Dorm Room Storage Ideas Before You Buy Containers
The first stage of effective dorm room storage ideas
is not choosing bins. It is recording the exact space, supplied
furniture and opening clearance available so every later purchase has
a realistic place to work.
None of those containers is necessarily poor quality. They simply
entered the room before the room had been understood. Product
photographs showed useful boxes, but they did not show the height of
this bed frame, the depth of this wardrobe or the direction in which
this door swings.
Measurement changes storage from guesswork into placement. It also
reveals that capacity is more than an empty rectangle. A drawer needs
room to extend. A rolling box needs space for its handle. A wardrobe
organiser must fit beneath the hanging clothes rather than beneath an
imaginary rail with nothing on it.
Begin With Everything the Residence Already Provides
Before adding storage, list the furniture and fittings that already
belong to the room. This may include a wardrobe, desk drawers, bedside
unit, bookcase, high shelf, wall hooks, under-bed drawer or small
cupboard.
Open every door and drawer. Look behind furniture where access is
permitted. Check whether the wardrobe shelf is deep enough for a box,
whether the suitcase can remain beneath the bed and whether the desk
includes a narrow drawer that could hold stationery without another
organiser.
Supplied capacity should be assigned before new containers enter the
plan. Otherwise, a student may buy a cart for toiletries while an
unused cabinet already offers a better location.
Houselyn Signature Exercise
Complete the Storage Capacity Audit
Inspect the room in ten zones. Record what exists, what can move and
which areas require approval before they can be used differently.
1
Bed and Under-Bed Area
Note frame obstructions, existing drawers, floor clearance and the
direction from which containers must be reached.
2
Wardrobe Interior
Record rail height, shelf depth, clothing length, door style and
the usable floor beneath shorter garments.
3
Desk and Drawers
Measure drawer interiors and confirm how much desktop must remain
clear for a laptop, lamp and active study materials.
4
High Shelves and Tops
Check safe reach, available depth and whether stored items would
remain clear of ceilings, vents and safety equipment.
5
Door and Entrance
Observe the swing, latch, lock, frame gap and any rules affecting
over-door or attached storage.
6
Narrow Gaps
Inspect spaces beside the desk, wardrobe or bed, but protect
access to sockets, drawers and heating equipment.
7
Existing Hooks
Identify supplied hanging points and note the lightweight
categories they could support without overloading them.
8
Luggage Capacity
Decide whether suitcases can hold occasional belongings instead of
sitting empty for most of the term.
9
Shared Storage
Separate personal capacity from cupboards, shelves or floor zones
that must be agreed with a roommate.
10
Clear Floor Area
Mark the route needed for entry, dressing, chair movement and
opening the room’s existing furniture.
Measure the Route, Not Only the Destination
A container may fit beneath the bed yet still fail because it cannot
pass between the bed leg and the desk chair. A drawer unit may fit
inside the wardrobe but remain unusable when the wardrobe door blocks
its front.
For every planned product, record the storage dimensions and the path
required to use it. Include handle depth, wheel height, lid movement,
drawer extension and the space needed for a hand to grip the
container.
Record the Narrowest Point
The narrowest opening often determines whether a product works. This
may be a bed-frame support, wardrobe hinge, desk leg or radiator gap.
Measuring the widest empty section alone can produce a misleading
result.
Divide Purchases Into Three Decisions
Not every storage item needs to wait until arrival. The useful
distinction is whether the product depends on a dimension, a shared
decision or an accommodation rule.
Safe to Buy Early
Portable pieces that do not depend on room measurements, such as a
personal toiletry caddy or foldable laundry bag.
Measure Before Buying
Under-bed boxes, wardrobe drawers, shelf inserts, carts and any
item designed for a specific gap.
Confirm Rules First
Bed risers, over-door organisers, adhesive products or anything
that changes supplied furniture and fixed surfaces.
Measuring furniture, openings and access routes turns empty gaps into
reliable information for the storage plan.
Part I • Discover the Capacity
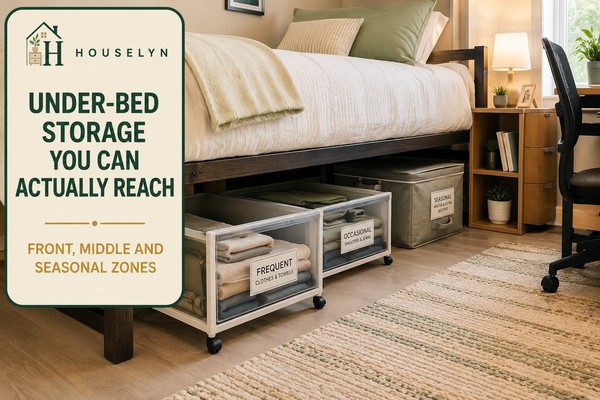
Claim Under-Bed Space With Dorm Room Storage Ideas You Can Reach
Under-bed dorm room storage ideas can recover one of
the largest unused zones in a student room, but only when the
containers fit beneath the actual frame and can be pulled out without
moving a chair, rug or second storage product first.
The area below the mattress can offer substantial capacity, yet depth
without structure often creates a dark holding zone rather than useful
storage. Effective dorm room storage ideas divide that
depth according to how often each category must be retrieved.
The aim is not to push the greatest possible quantity beneath the bed.
It is to create an arrangement where containers open fully, handles face
the accessible side and the student can identify what belongs at the
front, middle and back.
The Under-Bed Clearance Check
Measure the Lowest Obstruction, Not the Highest Gap
Bed frames rarely provide one uninterrupted opening. Supports, legs,
existing drawers and safety hardware can reduce the usable height or
divide the space into smaller sections.
Clear Height
Measure from the floor to the lowest fixed part of the frame,
allowing additional room for wheels, handles and slightly raised
lids.
Usable Width
Record the distance between bed legs or frame supports rather than
assuming the entire mattress width is available.
Retrieval Depth
Confirm how far a box can slide before it meets a wall, desk,
bedside unit or furniture positioned on the opposite side.
Pull-Out Route
Leave enough floor space for the container to extend and for the
student to stand or kneel beside it comfortably.
Match the Container to the Category
A single container style rarely suits everything stored beneath the
bed. Shoes need a different level of ventilation and visibility from
spare bedding, while folded clothing benefits from a structure that
prevents the contents from collapsing into one pile.
Rolling Drawers
Best for categories accessed frequently because the contents can
be reached without lifting a lid or dragging the container across
the floor.
Lidded Boxes
Useful for occasional belongings that need dust protection,
provided the lid can open or the complete box can slide out
easily.
Zipped Fabric Bags
Suitable for soft textiles and seasonal clothing when the bag has
handles, keeps its shape and does not become overfilled.
Existing Suitcases
Practical for rarely used possessions because the luggage already
requires a place and can carry the same contents during move-out.
Use the One-Move Access Test
Frequently used belongings should require no more than one significant
movement to retrieve. Pulling out one drawer passes the test. Moving a
chair, shifting a basket and lifting another box before opening the
needed container does not.
Test the arrangement with the rug, chair and bedside furniture in
their normal positions. A plan that works only when the room is
temporarily cleared will create friction during an ordinary week.
Avoid Loose Storage Behind the Containers
Small gaps at the rear can attract shopping bags and forgotten items.
Either assign that space deliberately to a low-frequency category or
leave it empty. Unplanned leftovers are difficult to see and even
harder to retrieve.
Treat Bed Risers as a Rule-Dependent Decision
Do not assume the supplied bed can be lifted with a retail riser.
Accommodation providers may prohibit independent height adjustments,
restrict the type of support used or require staff to alter the bed.
Use the bed at its approved height unless written guidance confirms
another option. Storage boxes must never act as structural supports,
and no container should touch electrical equipment, heating fixtures
or moving parts beneath the frame.
A frequency-based under-bed layout keeps regular belongings near the
accessible edge and reserves the deeper section for occasional use.
Part II • Build Storage Vertically
Make a Small Closet Hold More With Dorm Room Storage Ideas That Use Height
Closet-based dorm room storage ideas work best when
the wardrobe is divided by garment length, access frequency and usable
height rather than filled with one rail of compressed clothing and an
unplanned pile on the floor.
A small wardrobe rarely needs one dramatic organiser. It needs several
modest layers that respect the length of the clothes, the depth of the
shelves and the way the doors open.
The strongest dorm room storage ideas for a closet
create usable divisions without compressing garments, overloading the
rail or placing daily items behind objects that must be moved first.
Read the Closet From Top to Bottom
Begin at the highest shelf and work towards the wardrobe floor.
Record the height of each section, then compare those measurements with
the belongings that must occupy them.
High Shelf
Reserve the uppermost area for light, low-frequency categories such as
spare bedding, formal accessories or seasonal clothing. Containers
should remain within safe reach and must not obstruct ventilation,
ceilings or nearby safety equipment.
Hanging Zone
Separate long garments from shorter pieces before introducing drawer
units or hanging shelves. A full-length coat determines more of the
available floor clearance than a row of shirts.
Wardrobe Floor
Use the base for contained shoes, a stable drawer unit or another
category that can be reached without disturbing the hanging section.
Loose piles waste depth and make the lowest level difficult to clean.
Use Slim Hangers Without Treating the Rail as Unlimited
Slim hangers can reduce the width occupied by bulky plastic or wooden
alternatives, but greater rail capacity should not lead to a wardrobe
so compressed that individual pieces disappear.
Leave enough space to move hangers apart with one hand. If garments
remain tightly packed after switching hanger styles, the issue is the
amount of clothing rather than the hanger thickness.
Keep the rail within its intended load. Heavy coats, bags and hanging
shelf organisers can place additional strain on a supplied fitting
that was designed for ordinary garments.
Add One Vertical Divider Where It Solves a Defined Gap
A hanging shelf can create folded storage when the wardrobe lacks
drawers. A small freestanding unit may use the space beneath shirts.
A shelf riser can divide one deep upper surface into two accessible
levels.
Choose one principal intervention instead of stacking several systems
into the same narrow closet. Multiple hanging products can reduce the
rail, hide garments and make the interior feel more complicated than
before.
Protect Stability, Airflow and Clothing Condition
Fabric organisers should carry light folded clothing rather than dense
books, bottles or technology. High shelves need sensible weight
distribution, and any freestanding drawer unit should sit level without
leaning against the wardrobe door.
Allow recently worn coats, damp outerwear and shoes to dry before
enclosing them. A small closet becomes unpleasant quickly when every
category is sealed without ventilation.
Separating the wardrobe by garment length and access level allows the
full height to work without concealing daily clothing.
Part II • Build Storage Vertically
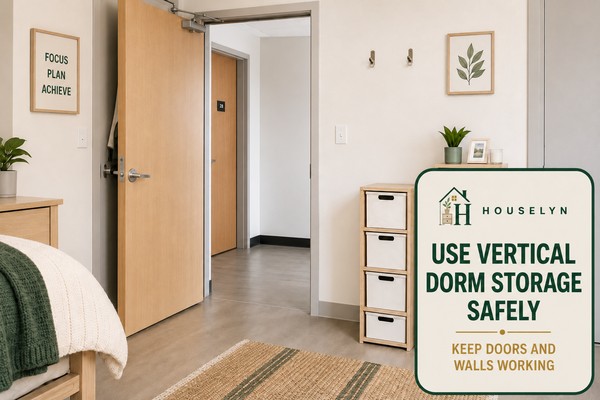
Use Dorm Room Storage Ideas Vertically Without Blocking Doors or Walls
Vertical dorm room storage ideas can relieve pressure
on the floor, but every elevated solution must preserve door
operation, safe reach, approved support points and access to the
room’s fixed safety features.
The organiser created pockets, but it also changed the behaviour of an
essential part of the room. Some dorm room storage ideas
appear space-saving until their weight, movement or fixing method is
considered alongside the door, wall and surrounding equipment.
Empty height should therefore be divided into four categories:
permitted height, supported height, reachable height and unavailable
height. A space must satisfy the first three before it can carry
belongings.
A Blank Surface Is Not Automatically a Storage Invitation
A wall may contain a smoke alarm, vent, thermostat or finish that
cannot accept adhesives. The area above furniture may sit beyond safe
reach. A door may look unused while still requiring space for its
hinge, closer, handle, lock and full opening arc.
Avoid placing stored objects above the bed unless the accommodation
provides a purpose-built, approved fixture. Falling risk, weak
attachment and awkward retrieval make improvised overhead systems
unsuitable for ordinary dorm living.
Check the Entire Door Cycle Before Adding an Organiser
Test the door with the organiser empty and again with its intended
lightweight contents. Hooks that appear harmless may scrape the top
edge, reduce the frame gap or make a fire door harder to close.
The Complete Door Cycle
Open Fully
Pause Halfway
Close Normally
Latch Without Force
Reach the Lock
Check Both Sides
Remove the organiser when the door rubs, rebounds, fails to latch or
becomes noticeably harder to control. Do not use hanging pockets for
large liquid bottles, heavy footwear collections, electrical
equipment, glass or dense books.
Use Wall Space Only Through an Approved Support Method
Permission to use an adhesive does not automatically mean the wall can
carry every object. Check the fixing, the surface and the planned
weight separately.
When allowed, a wall point may support a soft hat, empty tote,
lightweight accessory pouch or modest paper item. Heavy shelving,
loaded baskets, glass containers and dense storage above sleeping
areas should remain outside the plan.
Store by Safe Reach, Not Merely by Available Height
Level 1
Comfortable Reach
Use for lightweight belongings handled regularly while the student
remains standing in a stable position.
Level 2
Occasional Reach
Reserve for infrequent, light items that can still be collected
without climbing or stretching across furniture.
Level 3
Unavailable Height
Leave this area unused when retrieval requires a chair, bed frame,
rolling cart or other unstable platform.
Vertical storage succeeds when the door, lock, wall finish and nearby
safety features remain fully operational.
Part III • Store Daily Life
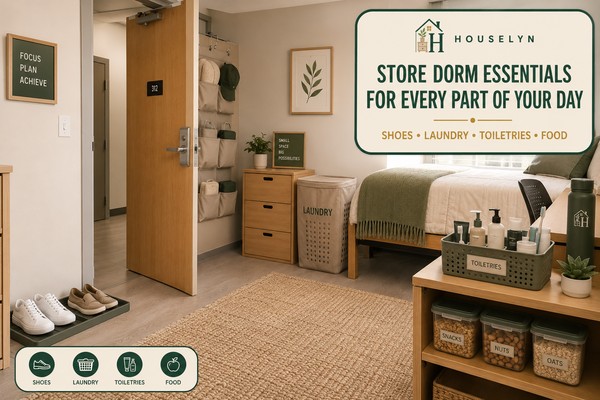
Use Dorm Room Storage Ideas That Follow Shoes, Laundry, Food and Toiletries
The most practical dorm room storage ideas position
everyday belongings near the route they already travel, allowing
shoes, washing, bathroom supplies and permitted snacks to move through
student life without settling on the bed, chair or desk.
These categories do not remain in one place naturally. They enter and
leave the room, travel to shared facilities or move between dressing,
eating and cleaning routines.
Routine-led dorm room storage ideas succeed by giving
each mobile category a landing point along its normal path. The chosen
container should make the next step easier rather than forcing the
student to cross the room whenever something must be returned.
Keep Footwear Close to the Point of Arrival
01
Build a Small Shoe Landing Zone
Everyday footwear should stop near the entrance rather than travel
across the room. Keep the current pair easy to reach and move less
frequently worn shoes into a contained secondary area.
Separate wet or dirty footwear from clean textiles.
Limit the entrance zone to regularly worn pairs.
Allow shoes to dry before enclosing them.
Keep the door and lock completely accessible.
Give Laundry a Permanent Departure Point
02
Match the Hamper to the Washing Routine
Position the hamper close to dressing space and along the route to
the laundry facilities. Its capacity should reflect how often the
student washes clothes, not how long washing can be postponed.
Choose ventilation for clothing that may retain moisture.
Use handles or a removable bag for easier transport.
Keep the container away from heaters and cooking equipment.
Avoid allowing the chair to become overflow storage.
Make Bathroom Supplies Ready to Travel
03
Separate Daily Toiletries From Refill Supplies
A portable caddy should hold the products required for one bathroom
visit. Backup bottles, unopened refills and occasional grooming
tools belong in a separate dry zone so the daily carrier remains
manageable.
Select drainage or ventilation where moisture is expected.
Allow the caddy to dry before placing it inside furniture.
Keep leaking products upright and securely closed.
Return the carrier to one predictable resting place.
Create One Permitted Food Zone Away From Clothing
04
Keep Snacks Visible, Sealed and Contained
Store permitted shelf-stable food inside one defined area rather
than distributing packets through desk drawers, bags and wardrobe
shelves. A contained zone makes quantities easier to see and keeps
food separate from clothing and toiletries.
Use closed containers appropriate for the packaged contents.
Keep dates and labels visible during ordinary use.
Clean spills promptly and remove empty packaging.
Follow residence rules for food, appliances and preparation.
Do not store food beside cleaning products, damp laundry or personal
care liquids. Refrigerated items require approved cold storage and
must not be treated as ordinary shelf-stable supplies.
Keep the Cleaning Kit Small and Upright
A compact room usually needs only a restrained collection of approved
cleaning supplies. Store bottles upright in a contained lower area,
preserve their original labels and keep them separate from snacks,
towels and personal care products.
Follow every product instruction and the residence’s cleaning
guidance. More products do not necessarily create a cleaner room; they
often add duplicate bottles and increase the chance of leakage.
Shoes, laundry, toiletries and food remain easier to return when each
category is positioned beside the journey it repeats.
Part III • Store Daily Life
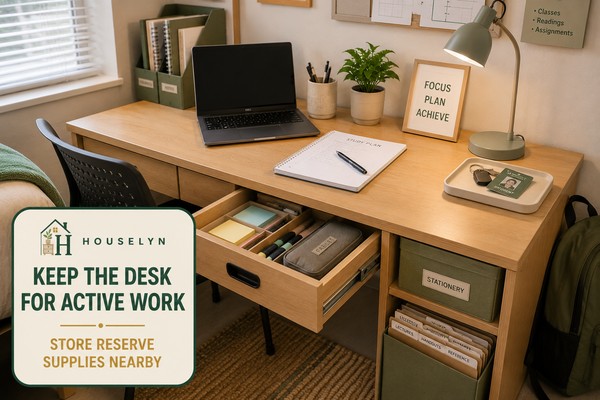
Use Dorm Room Storage Ideas to Contain Study Supplies Without Losing the Desk
Study-focused dorm room storage ideas should protect
the desk as a working surface rather than convert it into a permanent
display of notebooks, spare stationery, chargers, personal care items
and unopened supplies.
The problem is not necessarily a lack of furniture. It is the absence of
a boundary between materials needed for the present task and supplies
being kept for later.
Among the most useful dorm room storage ideas is a
deliberate division between active work and reserve stock. The desk
holds what supports today’s study session; drawers and nearby storage
carry the materials that make future sessions possible.
Match Supplies to the Depth of the Drawer
A deep drawer is not automatically suitable for small stationery. Pens
and memory cards disappear beneath larger objects unless a shallow
layer defines their position. Conversely, a narrow tray cannot hold
paper or bulky technology accessories without creating overflow.
Shallow Drawer
Small Study Tools
Use low trays for pens, sticky notes, memory cards, clips and
compact technology accessories.
Medium Drawer
Notebooks and Pouches
Store flat notebooks, calculators, cable pouches and current
academic support materials.
Deep Drawer
Bulk and Reserve Supplies
Assign greater depth to paper packs, archived folders and larger
items that would dominate a shallow compartment.
Separate Paper by Status Instead of Stacking It Together
Loose paper becomes difficult to store when current work, reference
material and completed documents share one pile. Use three simple
statuses so each sheet has a clear direction.
The Three-Status Paper Flow
Active
Required for a current assignment or class.
Reference
Useful material that supports future work.
Complete
Ready for filing, scanning or approved disposal.
Separating active materials from reserve supplies allows the desk to
support study while nearby drawers carry the remaining academic stock.
Part IV • Make the Storage Last
Master Dorm Room Storage Ideas That Adapt After Move-In
The final stage of effective dorm room storage ideas
begins when actual student habits replace move-in predictions. The
room must now reveal which containers support daily life, which create
avoidable effort and which no longer deserve their position.
The original arrangement was not a failure. It was a first version based
on limited evidence. Adaptable dorm room storage ideas
treat the first weeks of residence as useful feedback rather than proof
that the student should buy more products.
Watch where belongings collect, which compartments remain unopened and
which storage actions feel disproportionately difficult. These signals
reveal whether the location, format or category assignment needs to
change.
Protect Capacity for Belongings That Have Not Arrived Yet
A dorm rarely contains the same belongings in October that it held on
move-in day. Course materials accumulate, weather changes, gifts arrive
and occasional purchases introduce new categories.
Mature dorm room storage ideas preserve one partly
empty drawer, shelf or flexible container rather than filling every
available section immediately. This reserve prevents each future
addition from triggering another purchase.
Design the Storage With Move-Out in Mind
The final test occurs when the room must be cleared. Products that can
carry their own contents, fold flat or work in a future room reduce the
number of separate decisions required at the end of term.
The Move-Out Readiness Check
Keep lids and removable parts with their original containers.
Label ownership clearly in a shared room.
Use luggage for occasional storage during the term.
Avoid products shaped for only one unusual furniture gap.
Fold collapsible pieces before they become damaged.
Confirm that loaded containers can pass through the doorway.
An adaptive storage system uses fewer obstacles, protects everyday
access and reserves enough capacity for the room to change over time.
These dorm room storage ideas answer the practical
questions that often appear before move-in, during the first weeks of
residence and when belongings begin changing through the academic
year.
What storage should I buy before moving into a dorm?
Buy only portable basics that do not depend heavily on the room’s
dimensions. A laundry carrier, shower caddy, small personal tray
and flexible luggage organisers can often be selected early.
Dimension-dependent dorm room storage ideas such
as under-bed drawers, wardrobe inserts, narrow carts and shelf
dividers are safer to choose after seeing the actual furniture.
Online photographs rarely reveal every support bar, hinge or
unusual gap.
How can I create more storage if the dorm bed cannot be raised?
Use the bed at its approved height and develop capacity elsewhere.
Look for existing drawers, unused suitcase interiors, the space
beneath short wardrobe garments and narrow floor-supported storage
that does not affect movement.
Useful dorm room storage ideas do not depend on
increasing bed height. Better category limits, seasonal rotation
and removing duplicate products can recover space without changing
supplied furniture.
Are over-door organisers allowed in university accommodation?
Rules differ between residences, so check the accommodation
agreement or ask the housing team before installation. Even when
over-door products are permitted, the door should still close,
latch and lock normally.
Keep hanging contents light. Remove the organiser if the hooks
scrape the frame, affect a door closer, conceal hardware or make
the door noticeably harder to control.
Where should suitcases be stored during the academic year?
Suitcases can become useful storage instead of remaining empty.
Place seasonal clothing, spare bedding or other occasional
belongings inside them, then store the luggage in an approved
under-bed area, wardrobe base or another accessible low-frequency
position.
This is one of the most efficient dorm room storage
ideas because the container is already required for
travel and move-out. Avoid filling it with anything that may be
needed unexpectedly.
How should food and cleaning supplies be stored in a dorm?
Keep permitted shelf-stable food inside a dedicated, clean and
closed zone. Store cleaning products separately, upright and in
their original labelled packaging.
Food should not share a container or shelf with leaking toiletries,
damp fabrics or household chemicals. Follow residence instructions
concerning cooking equipment, refrigeration and any prohibited
products.
How can roommates divide shared storage fairly?
Separate personal storage from genuinely shared space before
either roommate fills communal cupboards or floor areas. Agree
which shelves, hooks and surfaces belong to each person and which
categories will be shared.
Shared dorm room storage ideas work better when
boundaries are visible. Equal physical space may not always be
necessary, but both students should understand the arrangement and
be able to use the room without moving the other person’s
belongings.
What is the best way to store seasonal clothing?
Clean and dry seasonal garments before storing them. Use a
breathable or appropriately closed container according to the
fabric, then position it in a low-frequency zone rather than an
everyday drawer.
Review seasonal clothing when the weather changes. Returning
off-season pieces to the easiest locations will make current
clothes harder to reach and can create the impression that the
wardrobe is smaller than it is.
How many storage containers are too many for one dorm room?
There is no universal number. Containers have become excessive
when they occupy functional surfaces, block furniture, remain
mostly empty or create several places for the same category.
Well-planned dorm room storage ideas usually use
fewer containers with clearer roles. Before adding another one,
identify the exact category, intended location and reason the
existing system cannot hold it.
How can dorm storage look calm instead of crowded?
Repeat a restrained material or colour family, but do not purchase
identical containers before confirming the required sizes. Keep
frequently used categories easy to identify and place visually
busy packaging inside simple enclosed storage where appropriate.
Calm-looking dorm room storage ideas leave some
space visible between objects. A shelf does not need to be filled
from edge to edge, and every surface does not require an
organiser.
How often should a dorm storage system be reviewed?
Conduct the first review after the room has been used for roughly
two weeks. Review it again when the season changes, coursework
increases or a repeated pile begins appearing outside its assigned
zone.
The purpose is not to reorganise constantly. Make a change only
when the current position, container or category boundary is
creating repeated difficulty.
Where should spare bedding and towels be kept?
Keep one immediately useful spare set accessible, then place
additional textiles in a clean low-frequency area such as a
suitcase, lidded under-bed box or approved high wardrobe shelf.
Bedding-focused dorm room storage ideas should
avoid compressing fabrics so tightly that they become difficult to
identify or air. Store every item completely dry and keep textiles
away from food, damp footwear and cleaning products.
How can I prevent odours or moisture inside dorm storage?
Do not enclose damp towels, recently worn outerwear or wet bathroom
products. Allow them to dry in an appropriate permitted location
before returning them to storage.
Keep containers clean, avoid overfilling and choose ventilation
for categories that need airflow. Investigate persistent dampness,
mould or unusual odours through the accommodation team rather than
attempting to conceal the problem with fragrance.
Complete the Houselyn Dorm Storage Journey
Turn Dorm Room Storage Ideas Into a System That Supports Student Life
The value of dorm room storage ideas is not measured
by the number of containers added to a room. It is measured by how
easily the student can study, dress, sleep, enter, leave and prepare
for the next activity.
Storage Should Give the Room Back to the Student
A well-designed dorm does not need to look like a storage showroom.
The bed remains comfortable, the desk remains available for academic
work and the entrance continues operating without obstruction. Clothing
can be recognised, daily supplies have predictable resting places and
the student does not have to unpack several unrelated objects to reach
one needed item.
That outcome comes from treating storage as a sequence of decisions
rather than a collection of products. Dimensions establish what is
possible. The contents determine the correct format. Routines establish
the most helpful location, while real use reveals what should be
adjusted later.
What a Successful Dorm Storage System Looks Like
Successful dorm room storage ideas produce practical
outcomes that remain visible during an ordinary week, not only after a
complete reset.
Every Major Category Has One Primary Home
The student knows where shoes, washing, course materials,
toiletries, food and spare textiles belong without choosing a new
location each day.
Fixed Room Functions Remain Protected
Doors, drawers, ventilation, heating equipment, sockets and safety
devices continue operating without interference from stored items.
Containers Have Defined Responsibilities
Each product supports a named category instead of becoming a
temporary destination for unrelated belongings.
The Room Can Absorb Change
Some capacity remains available for seasonal clothing, new course
materials and temporary supplies that appear later.
Learn how to decorate a stylish and comfortable living room with practical design advice, timeless styling ideas, and expert inspiration from Houselyn.
Discover dorm bedding ideas that make small rooms feel like home. Learn how to create a cosy, stylish, and practical college dorm with smart bedding, storage, and decorating tips.
Use these dorm desk organization ideas to create a clear college study space with better drawer systems, vertical storage, cable control and simple resets.
Discover practical dorm room organization ideas that help you organize clothes, desks, storage and daily routines for a calm, clutter-free college room.
Discover college dorm decor ideas for colour, bedding, walls and personal touches that turn a plain student room into warm, stylish place that feels like home